How to configure an Approval Process
 Updated
by Leo Comia
Updated
by Leo Comia
Approval processes were created to help your organisation to manage its documents. Once enabled, when a new document is added or an existing document is checked-in, it should be reviewed by an approver group before becoming active in the system. Approvers may 'Approve' a document to make it become live in Prompt or can 'Reject' a document so it must be updated before becoming live.
An organisation may have more than one approval process enabled, each approval process is assigned to an individual section, but there is also the option of disabling approvals for each section providing you greater control and flexibility of who approves and when a document requires approval.
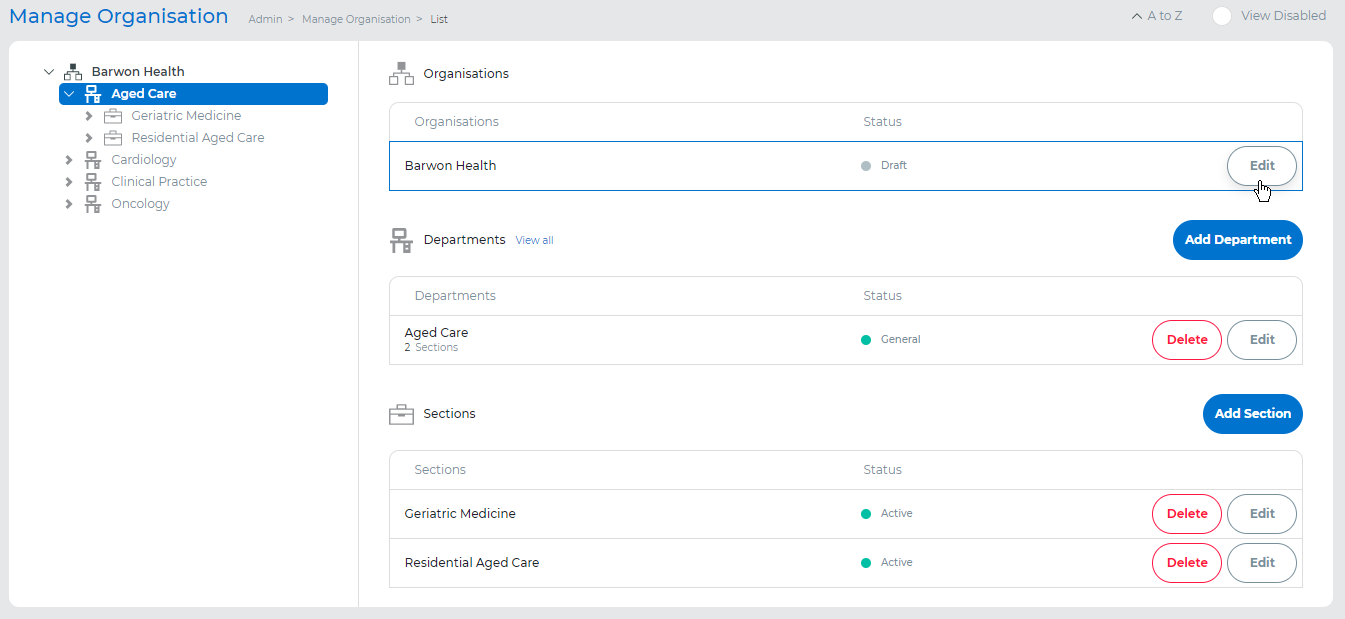
To set up an approval process, go to Admin > Manage Organisations and select Edit next to the name of your organisation.
Go to Submission Process tab and Enable Approvals.

Set up approval notification frequency The next step is to set up the notification frequency for the approval notifications, these are the default settings for all users in your organisation. Each user may ask a User Admin or Prompt Admin to override those settings manually on the Edit User page.
An approver will only receive a notification for the documents they can approve, not for all documents that are pending approval in an organisation. If enabled the Approvals Immediately option will send an email to all relevant approvers at the exact moment the document is sent to the approval process.
If enabled the As a Weekly Summary Email option will allow you to choose to send a weekly summary of all documents pending approval to each approver.
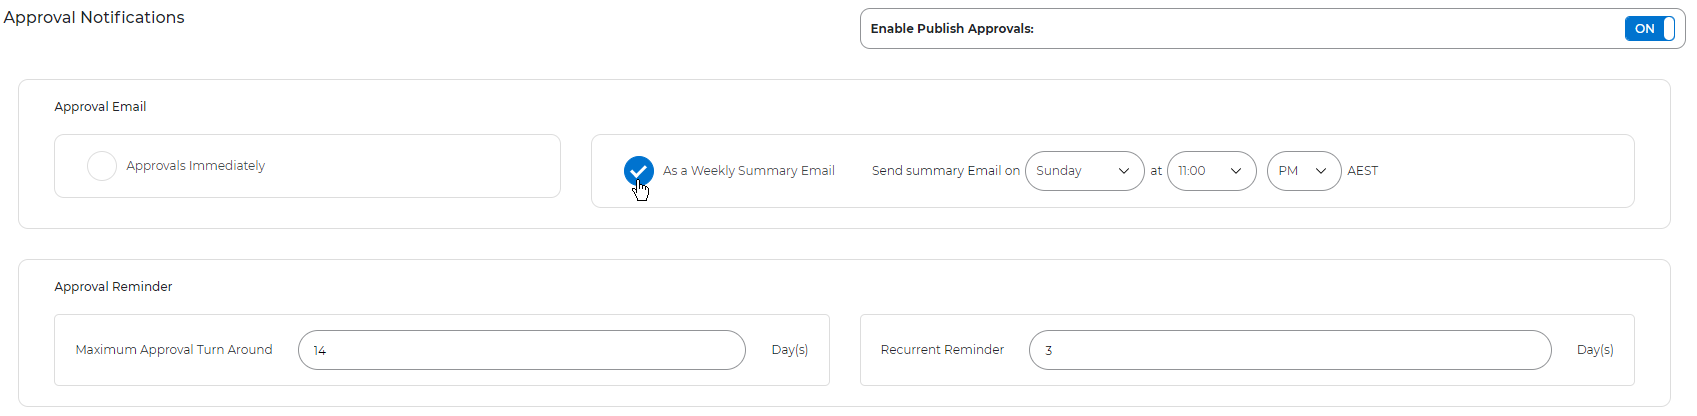
Prompt allows setting up of approval reminders which send additional email notifications to remind users to approve a document if they have not yet actioned the request.

Maximum Approval Turn Around: The number of days allowed for the initial approval of a document. If the document is not approved within this timeframe, Prompt starts sending email reminders
Recurrent Reminder the frequency (in days) at which reminder emails are sent after the `Maximum Approval Turn Around` period has elapsed.
Scenario | Maximum Approval Turn Around | Recurrent Reminder | Outcome |
No Reminders | 0 | 0 | No reminder is sent. |
Initial Reminder Only | 5 | 0 | A reminder is sent 5 days after the document is submitted for approval. |
Recurring Reminders | 5 | 2 | A reminder is sent 5 days after the document is submitted for approval, and then every 2 days thereafter until the document is approved. |
Immediate Recurring Reminders | 0 | 1 | Reminders are sent daily starting from the day the document is submitted for approval. |
Set up approval roles
An Approval Role is assigned to a user, in a specific location (Organisation, Department or Section) in the User Permissions page. All users with an Approval Role will be able to approve documents for the section they were assigned, if that section is configured with the same approval process.
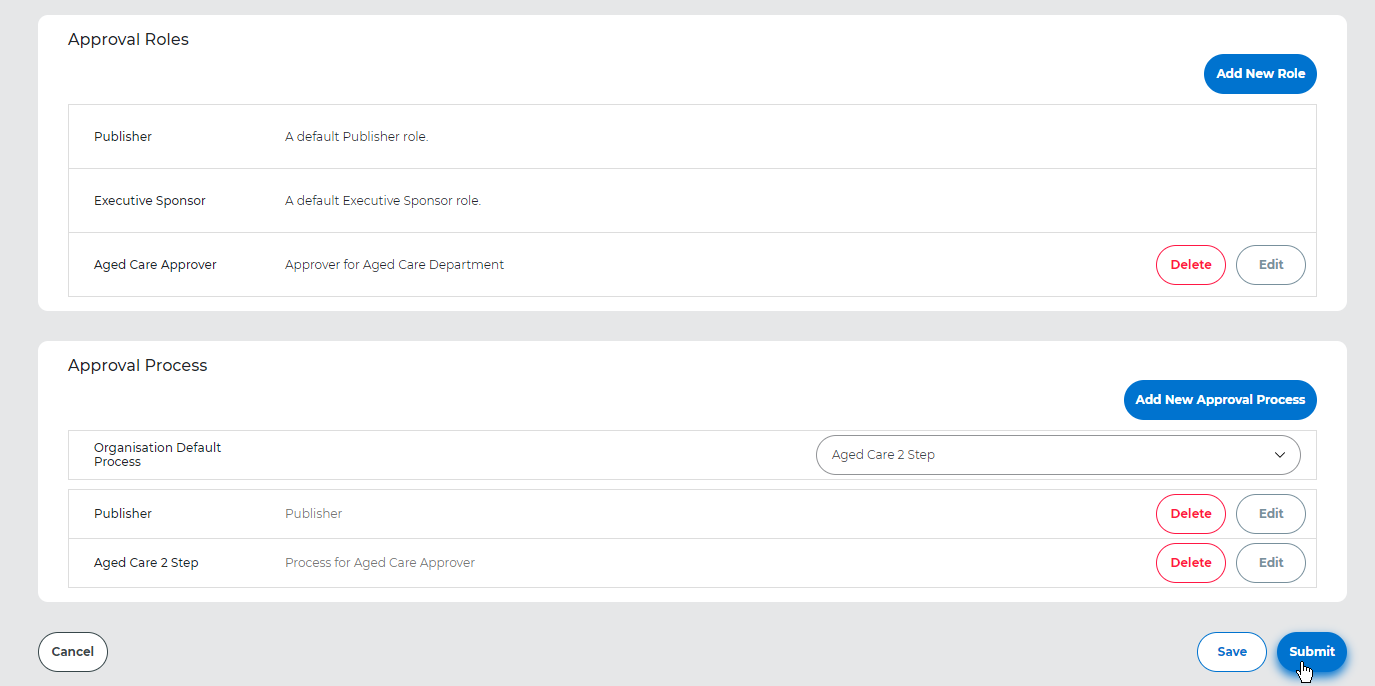
Prompt provides two default approval process roles, Publisher and Executive Sponsor. These roles may be customised and new custom roles created.
To create a new approval role
Admin -> Manage Organisations->Submission Process
Select the Add New Role button.

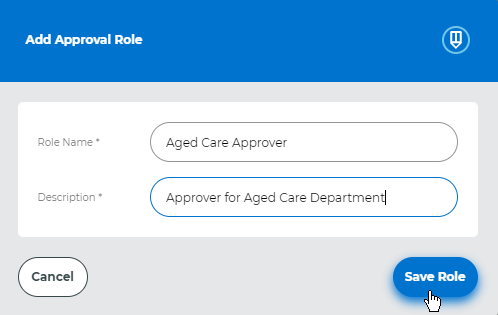
This will open a new window where you give a Name to your approval role and a short description as a reminder of the objective of that role.
Once completed, select the Save Role button to create your custom approval role.
If you want to remove an existing approval role, select Delete.

Executive Sponsor is a special approval role initially set up in the Admin > Document Tags page. Once a document is tagged with an Executive Sponsor, (provided this document is in a section that has an approval process requiring the approval of an Executive Sponsor), users with the Executive Sponsor permission must approve this document. If a document without an Executive Sponsor tag is added to a section requiring Executive Sponsor approval, the approval step will be skipped.
Set up an approval process
To create an approval process, select the Add New Approval Process button.

This will open a new window where you give a Name to your approval process and a brief description as a reminder of the objective of that role.
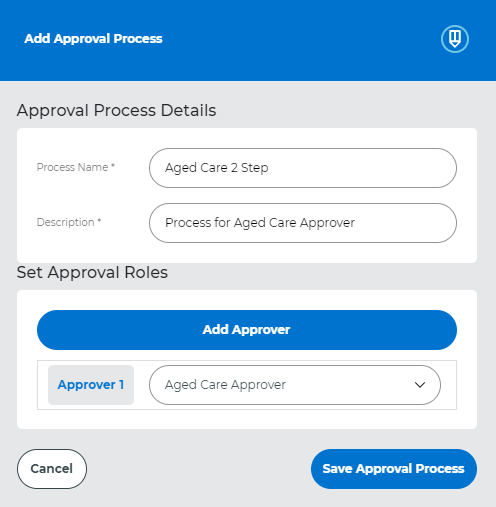
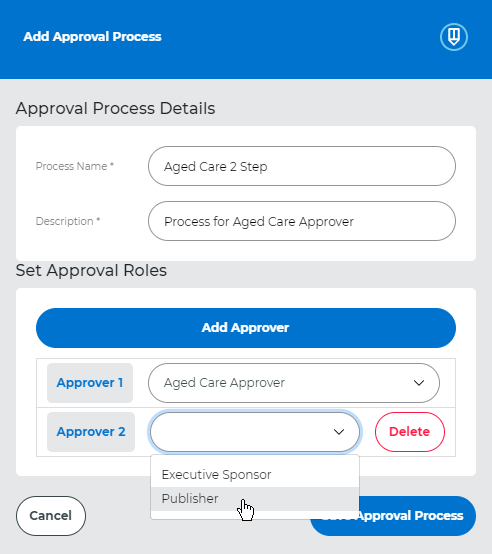
You may select the Add Approver button to assign a new approval role in an approval process. An approval process may have a maximum of 5 users.
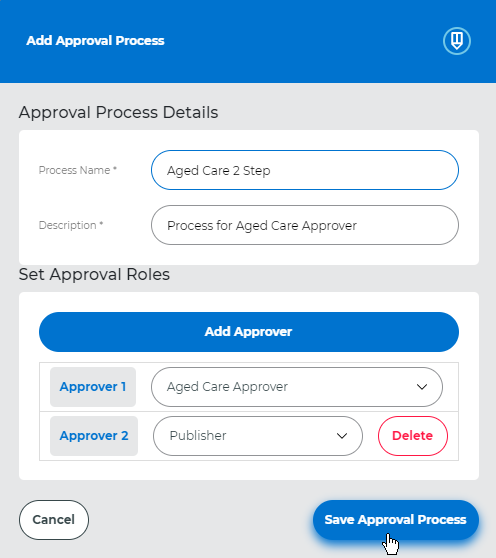
If you add an approver in error you may remove the approver by selecting Delete.
Once completed select Save Approval Process.
When you create an approval process it is possible to assign it as the default for your organisation. Every department and section from your organisation will use this default value. It is, however, possible to go into each section individually and change it's approval process.

Assigning an approval process to Departments and Sections
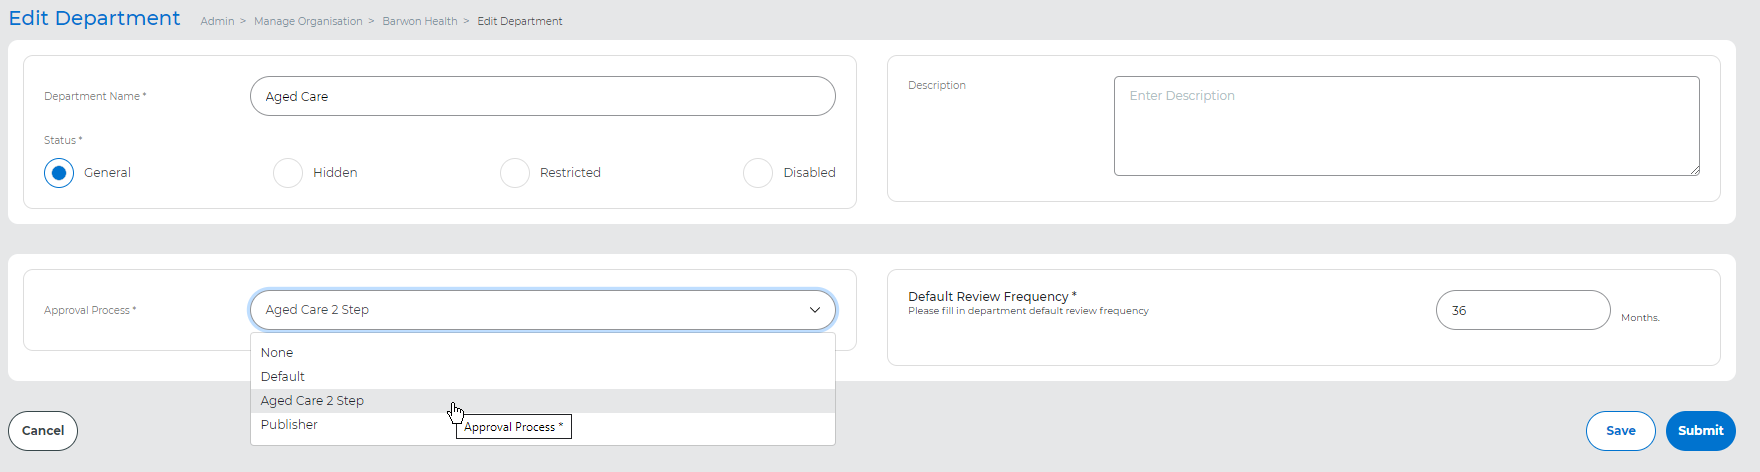
To assign an existing approval process to a department, go to Admin -> Manage Organisations and select Edit next to the name of your department.
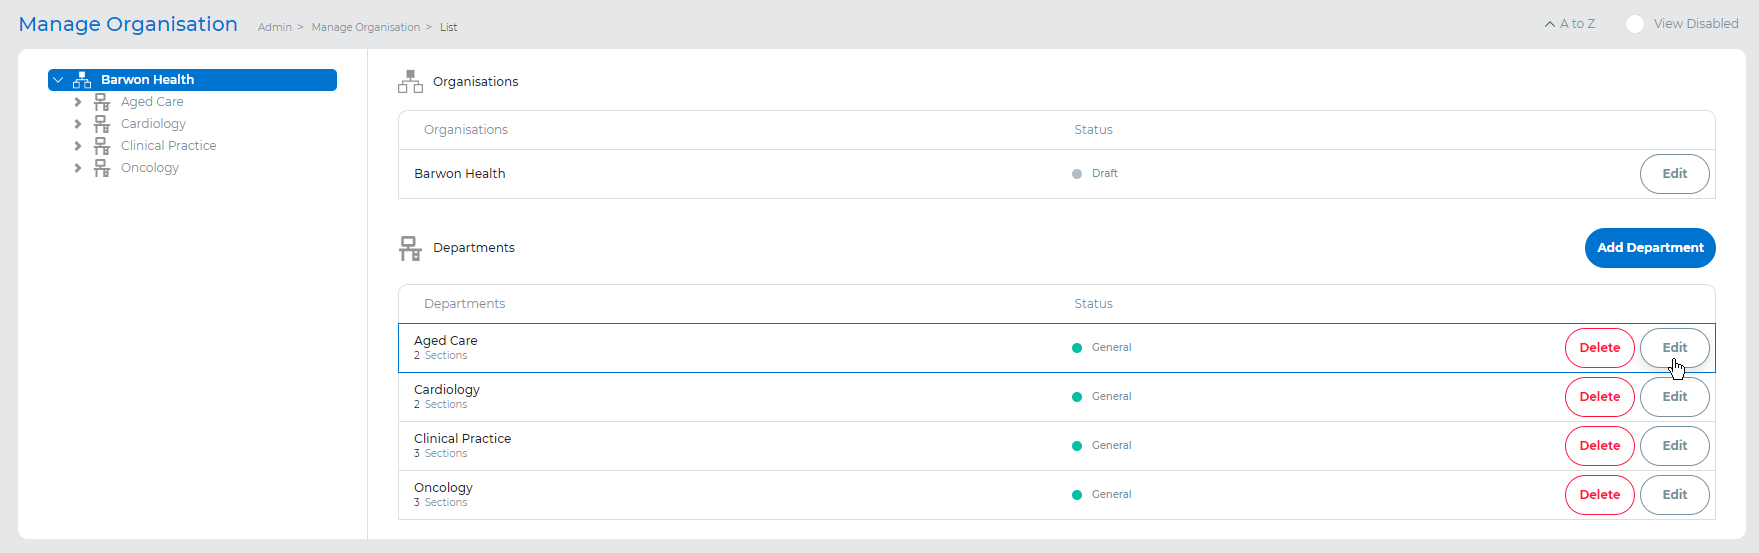
Initially, your department will be using the default approval process as previously set in the 'Edit Organisation' page. Under Approval Process you may use the drop-down list to choose another previously created approval process or set it to None.
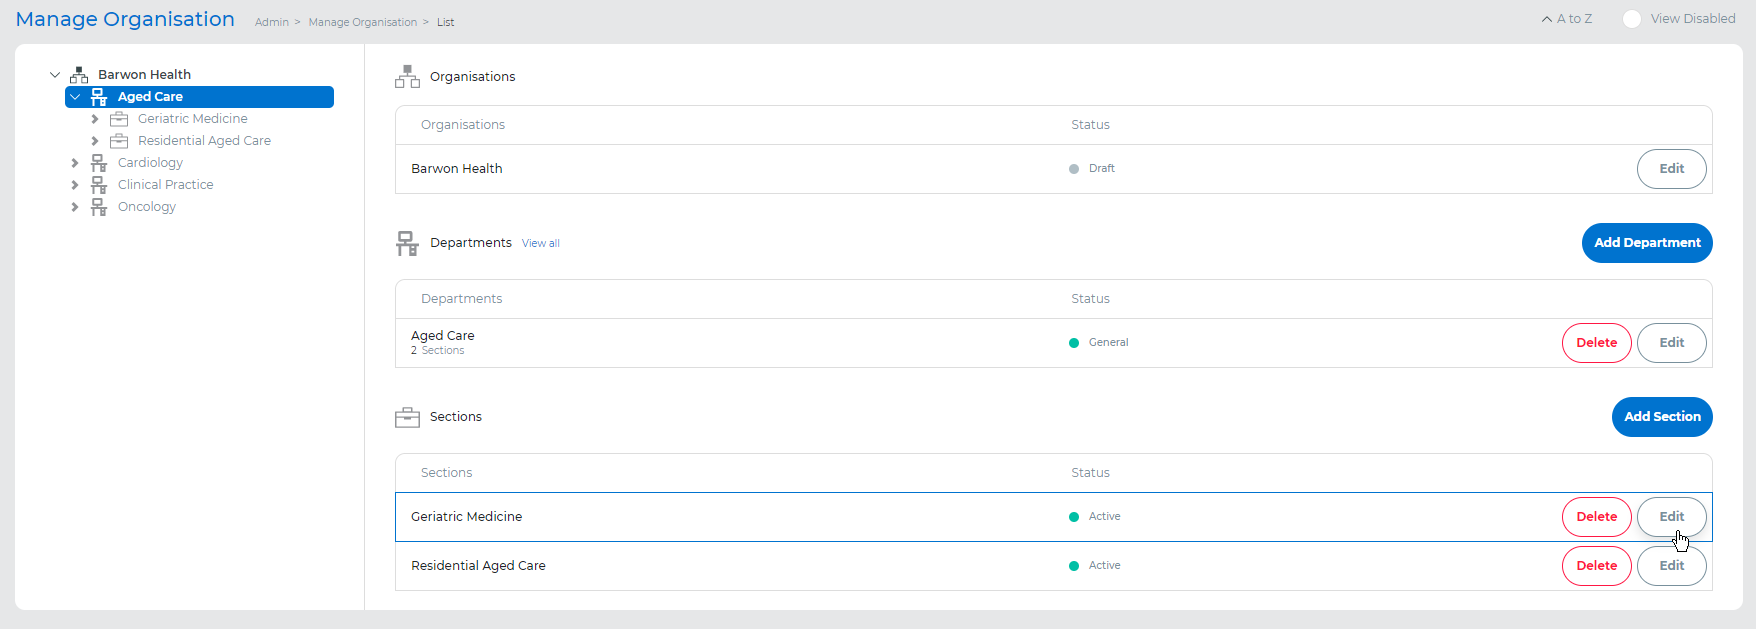
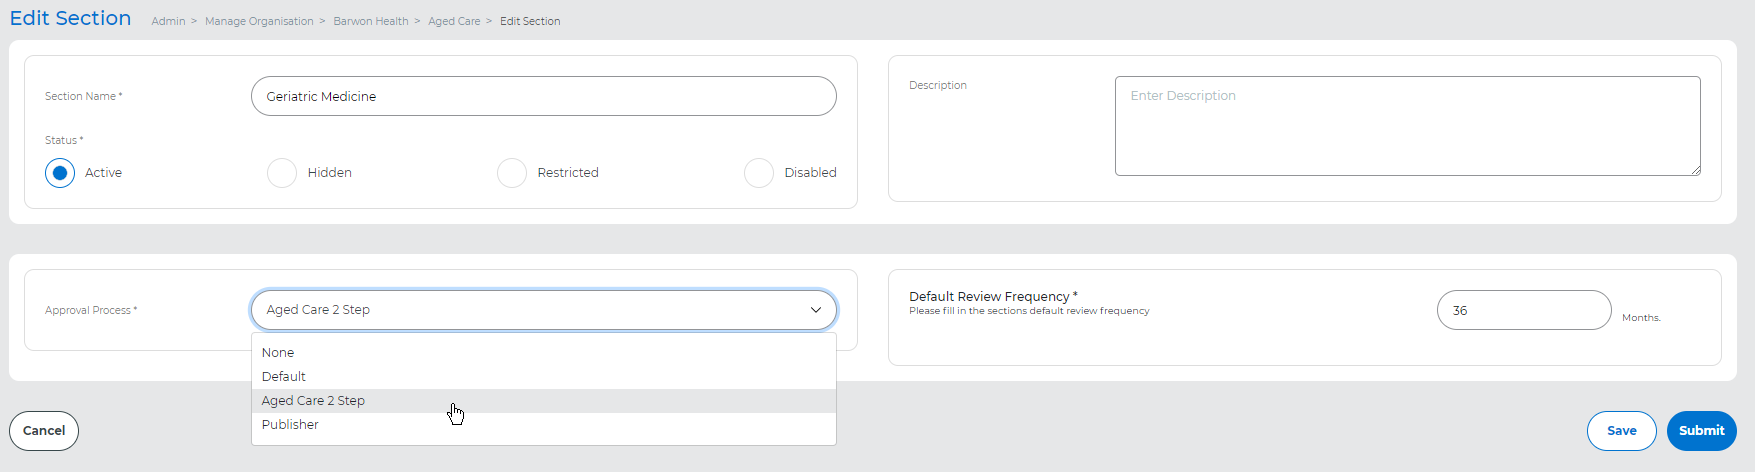
To set up the approval process of a section, first, select the parent department to see the list of all child sections, then select Edit next to the desired section.
Initially, your section will be using the default approval process as previously set in the 'Edit Organisation' page. Under Approval Process you may use the drop-down list to choose another previously created approval process or set it to None.
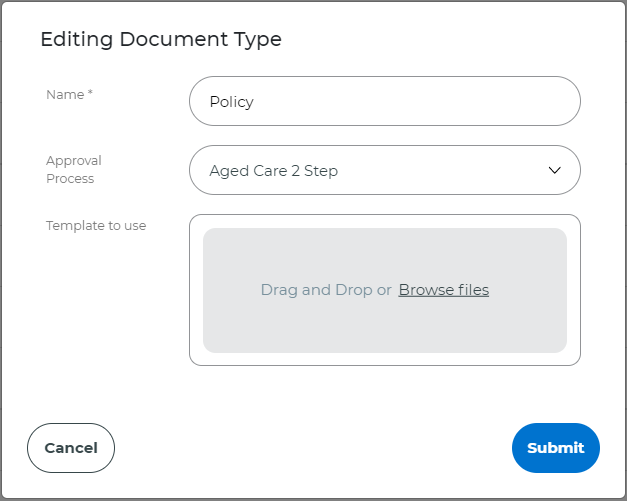
Approval Process by Document Types
To assign an existing approval process to a Document Type, go to Admin > Document Type, and select Edit next to the Document Type.
Note: Initially, the Document Types will use the default approval process as set in the Sections